Showing posts with label crafting. Show all posts

Monday, 13 August 2012

Seed Markers Made from Vintage Spoons!

This is another of my 'seen around the web thought I'd try it out' endeavours..... not the most successful one I've ever tried to be honest! It looked so easy..... but then it always does..... I bought a pile of unusual vintage spoons from ebay and a set of steel letter punches.
Here are the spoons in their original condition.... before I got Dewi to hammer them flat (approach this carefully - he was a tad enthusiastic and split a couple of the spoons near where they attach to the stem)....
These are the punches and here it became tricky as I'd underestimated just how HARD a steel teaspoon can be..... no, really, steel is VERY hard!!! In my naive little bubble I'd imagined tapping perfectly formed letters into the spoons and joining the ranks of crafting genii..... alas I joined the ranks of bumbling also-rans, and collected a couple of blood blisters along the way!!!!
Idris was fascinated with the whole process and laughed like a drain when I hit my thumb and hopped around the patio hissing unmentionable things about spoons and pinterest!
A couple of them turned out really well and at least I'll know which seedlings are which now!!!!! I think I'll look for other ideas to use the letter punches with next time.....

Monday, 9 July 2012

Rag Rugging is Addictive!


Welcome to a peek at our latest craft adventure- rag rugging (not sure if that is the proper term but that's what we call it!). A friend introduced us to the joys of Blists Hill Victorian Town two weeks ago, an amazing place of Victorian shops, houses and amusements where you really can live the history! I have no pictures of the day as I chose to leave the camera at home and just enjoy the time with my children! As we explored, I was struck by how many creative pursuits people (mainly women in the home) followed back then - everywhere we went we saw embroidery, rugs, lace, paper cutting, peg dolls, the skills the women had back then seemed endless. It touched me how much of that is sadly lost now that every convenience can be bought and replaced when the desire strikes. Many of the crafts were from cheap, recycled materials where waste items were re purposed into beautiful, cheerful decorations that made their simple homes snug and cozy. I quizzed the lady making rag rugs very carefully and decided we could manage to have a go!!! My friend stood us the hessian for the bargain price of £2.50 (as we'd spent ours on candles, the swing boats, and lacy handkerchiefs!!).

This is a picture of the back of the corner of the rug that I have started - we chose a pattern of circles, made by drawing around various cups, bowls and plates with a felt pen!! I'm not sure if I am doing it exactly right but it looks effective and once you have done a few, you get into a rhythm and it goes along faster!

Above, you can see us all working on the rug together, using tools made from a dolly peg snapped in two and then with a point formed carefully and blunted.

I chose two old duvet covers given by another friend - one brown with little flowers and one in yellow spots and stripes - I am not sure if they will be enough to do the whole rug but I'm hoping! I cut them up into small strips about 1 inch by 3 inches and put them in a soft bag for easy access, the rug and tools can be stored alongside them!

The technique is to poke a hole in the hessian with the point of the tool, push one end of the strip through, then move about four fibres down and make another hole and push the other end of the strip through, then pull it taut with your other hand from the other side of the fabric. I found it easier to work in a block, and to work from right to left so you aren't trying to hold the bunched up fabric you've already put in, out of the way!

This shows some of the circles we made for the pattern - I've done more than is in this picture and finding it very therapeutic! It's a bit like the wet felting we tried in that it doesn't require a precise finish so it is very forgiving to the beginner or serial multi tasker like myself!! I'm also impressed that, as we cut the hessian in half, this has so far cost £1.25 - the cheapest craft we have ever tried I think!!! We'll be back to Blist's Hill soon as it was so lovely - I may even take my rug to show them what we've been up to!

Sunday, 8 July 2012

Olympic Activities

 Knowing that we were seeing the torch relay, I planned an Olympic Activity morning for a few child Minders that I know and we all got together for some fun. We made Olympic ring paintings with plastic cups and plates of paint.......


......followed by Olympic medals with salt dough and cookie cutters and baked them. I have gold, silver and bronze paints ready to go for next week to paint them and then we can put ribbons on them and wear them!


 I was interested watching this little one who quietly worked away practising making them long after the others had drifted away! She doesn't follow verbal instructions for making things very well and struggled until shown how, then she was off and away!

I had baked a batch of little 'O' biscuits that morning (tweaked from an idea on activity village) and we iced them in the Olympic colours, then sat down and ate them whilst I read 'Peggy the Much Wenlock Piglet' to them to explain how the modern Olympic games came about. It was a great fun morning and a good start to the other activities that I have planned.

Friday, 22 June 2012

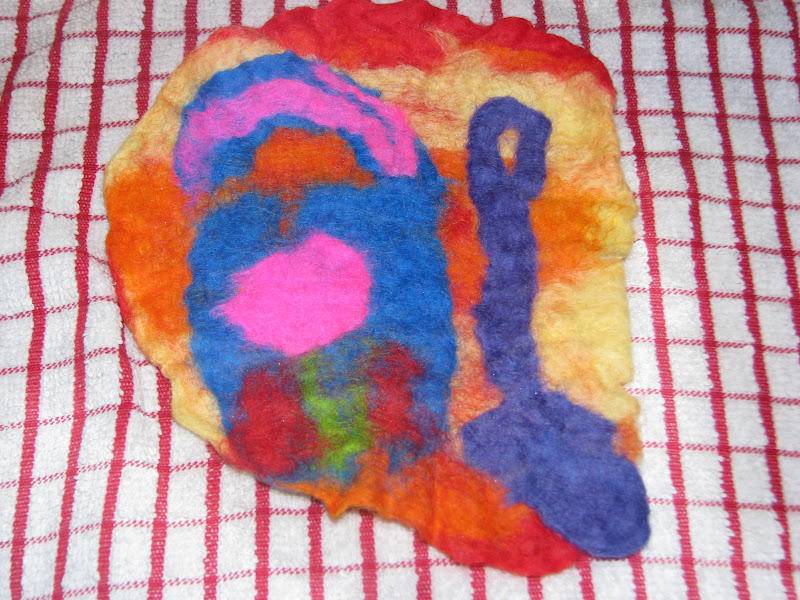
Felted Pictures Made with Wool Roving

I have had this wool roving for three years - seriously - and haven't got around to using it until now. Yesterday we went to a breastfeeding week event and the girls made little butterflies from wool roving balls felted down. It reminded me that I had some and we should really use it....... so this afternoon we did, and boy did we need that crafting time! My lovely girls have been revolting for the last 24 hours and it turns out they just needed an intensive hour and a half of crafting with Mummy to reset their moodometers to a rosier level!!!!

Eve made a garden with hers - this is quite a late stage where she was agitating the individual pieces on. We tried two slightly different methods - first of all, we made the base then added the 'picture pieces' on top and re felted it. After that we tried putting it all together in one go and felting it under a criss cross cookie sheet. Both methods worked and had different advantages - the first one meant that the felt base was wet and putting the small details on top was easier as they stuck, but the second method felted together more securely. The girls loved doing it and I think we will develop our method as we carry on experimenting!

 This is the first step - make the pieces wispy and spread them out into a shallow tray, dish oven pan etc etc.....

 Make up three layers, placing every new layer at right angles to the previous layer...

 This was the first base felted into a lovely neat round.....

 These are some of the tools that we used to add the detail into the picture - just from the kitchen drawer!! The bubbles are from washing up liquid, as far as I know, any soap will do!!

 We agitated the smaller details by hand - it feels wonderful, all slippy and silky!

 When we thought they were felted enough, we rinsed them under cold water and squeezed the excess out with a tea towel - this is Faith's bucket and spade!

Faith showed Idris how to do some felting - he enjoyed having a go!

Thursday, 15 December 2011

Stamped Corndough Ornaments

We played around this week with a twist on the traditional salt dough ornaments. I had the idea from this picture of clay tablets on pinterest. Obviously ours aren't quite as sophisticated but we had fun and there is definitely promise there for the future too! The dough is the same one we made snowmen from, the recipe is here. I rolled it out to about 4mm thick and then used stamps and ink to print onto cutout shapes.

I thought that the ink was red but it came out this rather bright shade of pink (much to the girl's approval I might add!). They look rather effective I think, I really like the purple shade on the writing although the silver ink (the 'peace' ornament) didn't come out so well. They dried in a few hours in a very low oven and could do with a coat of clear varnish to seal them. From past experience, if you don't seal them, they go soggy if you live in a cold and/or humid house!
This is Eve making a set of place cards for the Christmas table with the little alphabet stamps, they came out great too! I'm thinking they could be great for making gift labels or adding a pretty touch to table centres and decorating themes!