Showing posts with label science. Show all posts

Saturday, 27 April 2013

Earth Science - Rocks and Minerals

This was the third in the series of earth science sessions that I have put together for one of the HE groups that we go to. The first was to do with fossils and last month we looked at plate tectonics and the structure of the earth. This month we looked at rocks and minerals. I passed around a piece of granite to look at and told the children that it was a rock and got them to describe what they saw. They identified different coloured flecks in the rock, some shiny, some dull - I explained that these were minerals and that minerals were the ingredients of rocks. I told them that granite was an igneous rock, which means 'made by fire' and how igneous rocks looked different - we compared granite and pumice and talked about how the granite had cooled slowly as it was pushed to the surface, allowing the different minerals time to clump together, and that the pumice had cooled rapidly after being blown from a volcano as molten lava and so the minerals had stayed mixed together, giving the even tone.

We went to the table and I used wax crayons to explain and demonstrate the different types of rocks. There are many permutations of this idea around on the web and as I haven't used one specific plan so I haven't credited it to anyone in particular. The demonstration requires a heavy based pot with a depth of just boiled water in it and it went like this:
  • Sedimentary Rocks are rocks made from layers of rock particles, dust, sand and mud that filters down through oceans and lakes to the bottom, and becomes pressed into layers. The children were familiar with this concept from the fossils session. I had a bag of grated wax crayons as the particles and pressed them into a small foil cake tin to show how they form into sedimentary rock.
  • Igneous rocks - these are made when minerals are melted due to the incredible temperatures under the earth's surface - I broke crayons up and put them into another foil container and floated it on the water and left it until the crayons had completely melted (see picture above where they are partially melted).
  • Metamorphic rocks - these can be made from sedimentary or igneous rocks or a mixture of both, where they are changed by the immense heat and pressure and the length of time they are exposed to these forces under the earth's surface. To do this I put some of the sedimentary rock I made, some pieces of an igneous rock I had made earlier and some crayon pieces and floated them in a foil tin on the surface. After they had partially melted, i took the tin out and pressed them down with a spoon to represent the pressure they would be under - the children could see that the crayon pieces had changed from what they were.
We then went on to investigate how minerals are told apart by minerologists - by their different properties. I set up 'investigation stations' with a poster of printed instructions (these were intended that they be done by the children with their parent to help read and guide them.

Station 1 was Moh's scale of hardness, or the scratch test.......
Station 2 was the streak test, looking at what colours were left behind by the minerals when dragged across a porous surface (AKA the back of a wall tile begged from the local tile place!).
The pyrites surprised faith as it glittered like gold but left a greeny black streak! 
Station 3 was the magnetic test - only rocks with heamatite in will show attraction to the magnet - I guess they found one!
Station 4 was an acid bath to test for the presence of calcite in various rocks - I have to apologise to the resources library for the strong smell of vinegar present in some of the returning samples!!
The session didn't work so well today as it has previously. There were more families there and therefore a lot more background noise from the children that chose not to participate which caused me to have to almost shout over it at times and distracted some of the children from concentrating on the session. I chatted about it with the group organisers and we have a couple of ideas to try next time to make it work even with a larger number of families attending the group. There are some fabulous 'foodie' demonstrations to use to illustrate how the different rocks are made - I wasn't able to use them this time due to allergies in the children coming to the group, but am saving them up for when it comes up again with my children!!

There is much more detail and a scripted plan, as well the instruction posters for the mineral investigation stations, available as googledocs to download, print and use here:

Friday, 26 April 2013

Learning About the Digestive System

Next up in our series about the human body, we investigated the digestive system. This didn't involve the most visually impressive set of activities and experiments but they were very effective at showing the girls the steps involved. We started out sitting down with a biscuit to eat. As the girls bit into and chewed their biscuit I asked them to think about how they ate it, what was happening to the biscuit and which parts of their mouth were involved. They were quick to identify that teeth crunched up food and their tongue pushed it around the mouth. We simulated this with a dry cracker in a ziploc bag to snap and crush as the teeth do. As the girls worked on 'chewing' the cracker, I asked a few questions to lead them to think about how the food changed from dry and crumbly to wet and mushy in their mouth and how that made it easier to swallow. This is their saliva glands working.
The tongue pushes the masticated food (the girls loved that word!) to the back of the mouth and the throat where it is swallowed. It travels down the oesophagus, down which rings of muscle contracting one after the other create a 'wave' of movement that pushes the bolus down to the stomach. We simulated this with a plastic Easter egg inside a pair of children's tights (idea from the science matters website). The girls made rings with their fingers and contracted them above the plastic egg, pushing it down the leg of the tights.
Once the food has arrived into the stomach, strong muscles in the stomach wall contract to churn and mash the food into a pulp that is slowly fed into the small intestine. Acidic juices are secreted onto the food to help break it down. To simulate this we added some soda water to the cracker in the bag and continued to churn the contents into mush.
We moved on in the journey of the food bolus into the small intestine. As the small intestine is so long, we measured out the approximate length of 6.7m with a piece of red wool and snaked it backwards and forwards on the table. The girls also tried stretching it to see if it was as long as our house! We talked about how the food is broken down even further with the assistance of the gall bladder, pancreas and liver into it's smallest components to allow the body to absorb it and use the nutrients, carbohydrates, fats and proteins from the food. The girls remembered how the capillaries run very close to pick up oxygen from the lungs from when we looked at the cardiovascular system, they linked it to the small intestine and asked if that was how the nutrients were picked up - I was pleased they were linking previous knowledge to this session. It takes around four hours from when food is eaten to it being absorbed and used by the body. The final part of the journey is the large intestine where the last of the nutrients and much of the water is reabsorbed.
To show how effective the use of acidic secretions is in breaking down food, the girls put a whole sweet into two jars and a crushed up sweet into another two jars. To one example of each they added water and to the other example of each they added vinegar as an acid. We left them for a few hours without agitating the jars at all then came back to see what had changed......
The jars containing acids had clearly had a lot greater effect on the sweet than the jars containing water. the crushed up sweet in the acid had completely gone, leaving a fluffy pinkish residue on the surface and sugar crystals on the bottom of the jar, whilst the water had only managed to liberate a few grains of sugar from the crushed up sweet. It was a simple but powerful way of demonstrating the need for acidic secretions in the digestive system.
Whilst waiting for the acid to break down the sweets, the girls coloured a picture of the digestive system and sellotaped their woollen small intestines onto the centre. We added them to the body outlines we have been making through our human body studies.

Sunday, 21 April 2013

Learning About the Skeletal System


We started out with this life size printable juvenile skeleton, cutting it out and piecing it back together on another life size body outline that we drew - I think we might make these into a huge book when we are done with our human body science studies. Whilst we pieced them together we chatted about the skeleton and I asked the girls what they knew about the skeleton and what they wanted to know. As usual, there were some answers that surprised me!

We talked about the functions of the skeletal system, with a few leading questions and some knowledge from our previous sessions on the cardiovascular system the girls were able to summarise that the skeletal system provides a frame, protects vital organs, manufactures red blood cells and allows movement in conjunction with the muscles.
I reminded the girls about one of the functions of blood - transporting nutrients and minerals around the body and explained that the bones were living and had a really good blood supply. Eve jumped in and asked if it was so the bones could grow..... yes, and repair themselves, I asked her if she knew what the most important  mineral was for bones and she knew it was calcium. We did a little experiment on some chicken bones to show how important calcium is. The bones were washed and dried and the girls tried bending them to see how strong they were. They put them into a jar full of vinegar and we left them for a few days. When we brought them out they were really bendy (shown above held in cling film as the girls didn't want to handle them without it!). It was amazing just HOW bendy they were without the calcium!

The next day we built a 1.2m high cardboard skeleton (I got it on offer from The Works at Christmas for a lot less) and as we did so compared and categorised the different types of bones - long bones, short bones, flat bones, irregular bones and sesamoid bones.
We moved on to looking at the function of the long bones in producing red blood cells for the body. we made a model inspired by this post on the blog 'science matters'. We started by rolling some red fabric to be the red marrow in the centre, then rolled a piece of yellow dish cloth around it to represent the fatty yellow marrow around it.......
...... we added a piece of natural sponge around that to show the honeycomb structure of the spongy bone around the yellow marrow. Lengths of red and blue embroidery floss represent the arteries and veins that bring a rich blood supply to the red marrow and remove by-products and red blood cells....
..... to finish up we wrapped white paper covered cardboard tube around the sponge to show the dense bone which is the final layer and around the outside.
As a final session, we talked about how bones and muscles work together to allow movement. There are different types of joint, we talked about the major ones of ball and socket, slightly movable such as the vertebrae in the spine (below, idea came from here)......
..... and made a model of the elbow hinge joint, with red balloons to show the muscles contracting and relaxing, instructions can be found here. We actually did most of this a few weeks ago but there was a short delay before we could complete our hinge joint after I realised that you really can't blow modelling balloons up without a pump...... and then I had to locate the infrequently used pump!! I was really pleased with how well the children remembered the information. We recap at the beginning of each session and then build on that information, linking it together and making it relevant to their own bodies, it was good to see them recalling and using the things we had learned previously.
The google docs printout of this topic with all four sessions full of all the information that we went through is available here! I hope that you find it useful!

Saturday, 13 April 2013

A Nature Box for the Car!

I made this box up to be kept in the car for the Spring and Summer. Last year I found that we would be out and about, find something that really interested the children, or that we wanted to look up the name of, or we would find THE perfect dipping stream and have no nets. By the time we got home, the moment had passed, or the children were so tired that it wasn't the time to delve into the books. So I had the idea of a nature box to be ready and waiting when we wanted it! It contains:

  • nature identification guides for trees, flowers, birds, animals and insects
  • a sketch book and pastels
  • bug boxes with magnified lids
  • pond dipping nets
  • ziploc bags to keep finds in
  • washed out hoummous pots and a packet of tissues to protect finds like birds egg shells, dragonflies,  old wasps nests and so on that we find.
  • A white bottomed tub for putting some stream water in to keep our finds safe whilst we look at them.
I'm looking forwards to using them..... any more suggestions for the box?

Sunday, 7 April 2013

Learning About the Water Cycle and Water Filtration

We started out by reading the book 'A Drop in the Ocean, the story of water' and then demonstrated a couple of the rain cycle processes to illustrate what happens.
The set-up above is very simple and examples can be found all over the net so I have not attributed it to any one source. It consists of having warm water in a jar/jug, and placing a plate/bowl of ice cubes at the top, then waiting a little. What you see happening is water vapour that has evaporated from the warm water condenses onto the cooler sides of the jug and then runs down the sides into the water at the bottom (this represents precipitation!). I found a cool idea on the net for making this in a ziploc bag with the cycle drawn on the bag with permanent marker pen
Next we made clouds in a bottle using instructions from this great website and the children were amazed by this. You have to roll the bottle between every try to get rid of the condensation and look carefully as you release your grip on the bottle. What you see is a faint cloud very definitely forming as the pressure drops inside the bottle. What a fantastic way of showing the conditions needed to form clouds!
Next we played a water cycle game, which was inspired by an idea I saw (and now can't find again) where bowls of different coloured beads were placed around the room and the children rolled a dice at each station to see where their water droplet went next. They wrote a story about their water droplet at the end. I thought it was a neat way of showing that the water cycle is more complex than simply cloud-rain-lake-evaporation-cloud. I thought about it but couldn't make it work for a group of three children so adapted it by making several sets of cards using clipart and laminating them before cutting them out and shuffling them. I drew a basic cloud line and ground line on a large A2 sized piece of paper and the children took turns choosing a card from the pile and placing it on the paper where they thought it went. As the game went along we added a house, rocks as we talked about groundwater, a well drawing on the groundwater, a drainage system, and lots of arrows showing the potential movements of water from one area of the board to another. I had considered that I was under prepared for this part of the session as I didn't have a pretty pre-drawn game board all well thought out in advance. As it happened it was the best way to do it as the children TOLD ME the links and showed me where the arrows should point as we went along and it was a really good learning exercise for them.
After all the cards were used up, we talked about groundwater some more and linked it to drinking water and what our water looked like from a tap and how we thought it ended up so clean. The children thought that the water from a well would be muddy and not safe to drink. We talked around that a little with me asking them what was the point of digging wells if the water was going to be dirty and undrinkable? I lead them on to thinking about the layers of the ground that the water went through before it was drawn up in a well. They identified plants roots, mud, sand and stones as possibilities. Then I introduced the bags of materials I had collected (sand, stones, mud and some cotton wool pads as a control.
The girls were eager to get stuck in and split the tasks up between themselves to set up the filtration stations. I had prepared a bottle of muddy mucky water full of bits and they shared it between the filters. We eagerly watched to see what would happen, the girls made predictions, one thought the sand would filter the water the best and another thought the stones would. Disappointingly all of the filters produced filtered water of the same colour......
....... so we brainstormed what might have happened - what was different between the filter stations? What was the same? They realised that each filter station also had a coffee filter in the bottom (to stop the materials falling out of the milk bottle lid hole), and wondered if that may be very good at filtering and be the reason why the water samples all looked the same was because the filters were there?
We had a quick think about the problem to be solved..... we needed something in the bottom to stop the materials falling through but not affect the water being filtered. I suggested the fruit nets that were in the bin from the shopping yesterday and off we went to reclaim them! They plugged the holes nicely and the girls carefully scooped out the materials from the coffee filters and put them inside the new filters. We made some more mucky water to filter and off we went again. This time the sand did produce the cleanest water, not completely clean but not bad and the girls noticed that the particles that came through sank to the bottom so Faith decided that she would try it and just be careful so she didn't drink the bits..... erm no, maybe not Faith but full points for bravely offering your services! I prompted the girls to look at the filters and see what had changed about them and what was the same, they noticed that the water had made holes in them and that the stones now had big pieces of muck in it, like grass and twigs.
Enthused by their success the girls wanted to try layering the materials to see if all of them together produced cleaner water than individually. They set this up independently but in the end it produced filthy water as there was a sudden 'whoosh' and the net plugging the pouring hole gave way under the weight, leaving a hole through the materials. The girls were intrigued by this hole...... and chatted about how and why the water had gone through in that particular place.

All in all, although I felt under-prepared, and hadn't thought through the effect that the coffee filters would have on the experiment, it was the perfect set-up as it posed natural problems for the girls to think about and solve. It high lighted the importance of the design of an experiment and the planning, and that a failure doesn't mean disaster, it means thinking and adapting and testing again. The experiment was flexible enough that the girls could take it in the direction that they were interested in so was great for allowing them to take the lead instead of being narrow and one-directional. The happy occurrence of a bit of water erosion on the combined filter at the end could lead nicely onto other topics! 

Sunday, 24 March 2013

Earth Science - Structure of the Earth and Plate Tectonics


Read the Meredith Hooper Book 'The Island That Moved' - this is a little long winded for younger listeners, you can shorten the story a bit by paraphrasing it onto post-it notes ready to read to them. Then we sat around together and I reminded the children about the end of our last session when we made a fossil sandwich.....

Do you remember the last time when we talked about fossils and how they were buried under the earth? Do you remember the fossil sandwich that we made? How do you think that those fossils made their way to the surface of the earth to be collected by palaeontologists? Fossils of sea creatures have been found up mountains, what happened to get them up there? (talk about the children’s answers and work towards the earth moving. The story starts way below us at the centre of the earth……  Here is a model of the earth; I’m going to cut it open for us to see what’s inside! (show the play dough model of the earth and cut it open in front of the children for them to see the layers).
There are four layers to the earth:

·        This is the inner core (yellow), it is made of solid metal and it is super-hot.

·        The outer core (orange) is liquid metal and is also very very hot, it is under immense pressure, being squeezed and pressed by the weight above it.

·        The mantle (red) is cooler and more solid than the outer core, but it is liquid enough to be slowly moving all the time, like thick cake mix being stirred through by a wooden spoon, (speaking of cake mix, I made some earth cakes for you to try, break them in half and see if you can identify the layers of the earth).

·        The crust around the outside is made from jigsaw-like plates of rock called tectonic plates that move around very slowly on the mantle and bump into each other. Scientists think that millions of years ago, all of the earth’s continents belonged to one super-continent called Pangaea (show the children the globe with the continents on it, and then give them the felt continents to try and piece together on the zigzag construction paper. Once they have pieced them together then slowly pull the construction paper flat to show the continents moving apart from each other again)
 
As the tectonic plates move around on the slow-moving magma below (show the map of the tectonic plates), they bump into each other and different things happen (ask the children what they think might happen). From that, four different types of mountains can be formed:
·        Fold mountains occur when two plates collide head on and push against each other. The huge forces involved push the rock up and it folds and creases as it goes (show the children the demonstration with the towels).

·        Block mountains form when two plates rubbing together suddenly shift, they may have been caught for a long time then the rock suddenly gives way and the plates jump past each other. This often leaves a huge block of rock pushed up or one side of the fault jutting up. The shock waves from the sudden jump cause an earthquake (show the children the card moving in the jar of rice layers)
 
·        Dome mountains are pushed up  by magma, the molten rock is pushing at the solid plate from below and causes an enormous bulge to form in the earth (blow up a balloon covered by a towel with a piece of pipe, a bulge will form in the towel).

·        Volcanic mountains form when molten magma from the outer core and the bottom of the mantle forces its way up through the mantle and through a weakness in the tectonic plate(show the children the volcano model and demonstrate the reaction – remind to put goggles on). It either explodes out of the top with huge force, or trickles out gently and continually. Either way, the magma cools once on the surface and new layers of rock are now present. Under the ocean where oceanic plates move apart from each other, magma moves up into the gap and forms new ocean floor (demonstrate this with the crackers and the red jelly layer).
 The children were all keen to have a go at the practical models, and with their parents sitting around the table helping them out and talking about it with them, there was lots of great chatter and review of important concepts and words. Even the toddlers enjoyed the cracker 'plates' on jelly 'magma' (although they did end up eating most of it!)
 Predictably, the volcano was the most popular activity, and it did get awash with foamy magma after a while and the concrete mix that made the sides of the volcano slid off and ended up in the bin!!
 If I ever see another pan of play dough again I might cry but it was worth all the effort of making bags ful of different colours as the families all made their own play dough earth to take home and the children were really pleased with it! Once again I sourced ideas from various books and websites, adapting some of them. I used ideas from The Homeschool Den, the book 'How the Earth Works' and various pinterest sources which can be found on my pinterest science board (some ideas like the play dough earth have been done in so many ways that the original source is impossible to say!). I have saved the scripted session as a google document for you to use, to access it, you need a gmail address/google account - you don't have to use the gmail, just sign up to be able to access my documents! It was a more effective way of sharing with you than saving PDFs to a remote location!
 

Sunday, 10 March 2013

Hands-on Science Downloads


At the enthusiastic request of "can we do bones next?" from my girls, I have spent some time this weekend researching and putting together some material on the skeletal system. Whilst looking for information, I came across a number of 'unit studies' of the skeletal system, but all were heavily paper based with worksheets and folders to complete and didn't match what I was looking for. I wanted good solid information, and some practical activities to hang it on and bring it alive for the children. I'm not sure if my style of hands-on science is what other people are looking for, but having put in the effort, I'm going to make them more easily available for others to use if they want to.

To do this I'm going to collect them all together on one 'page' of the blog to make them easier to find and choose from. If you look along the top of the page under the big header photograph, you will see the page headings there, click on 'hands-on' science and it will open the page with the science that I have blogged about collected in one place. I've used a picture from each 'unit' and the heading below is linked directly to the post.

As the cardiovascular unit we did seemed to fall naturally into four sessions spread over two weeks, I've deliberately grouped the information into four sections this time, each with one or two practical activities. I have worked out a format for how I like to record the information to make it easy and useful for me, and then added some extra details to make it easy and useful for you, including links, resources and materials needed!! Please note though that the downloads will only be in this format from the skeletal system onwards as I've only just begun to write them this way!  The science units are available as a Google Document that you can download and print.  Can I just say how very pleased I am with myself for working this out???!!!

If you're wondering what age group or year group they are aimed at, I can't give you an exact answer. My girls are currently rising 6 and 8 years old and would be in years 1 and 3 if they were in school, but I haven't related the content to the National Curriculum - I have based it purely on the level I know that they are at. I picked up an idea last week to start with asking what the children know, what they want to know, and how they think they can find out, it is a great way to start a new topic. I refer to the children's ideas all the way through and flex everything to answer their questions and explore their ideas. Encouraging the girls to think through a problem and come up with their own answers by linking together what they already know is a brilliant way for scientific understanding to really sink in and stick with them.

Take a look at the Hands-on Science page and leave me any comments - this is the first time I've made things available and I'm still learning!! Blogger has dictated the order they appear on the page so it may jig around a bit as I add more onto it! I hope you find it useful and enjoyable!

Friday, 8 March 2013

Learning About the Cardiovascular System

 
A friend asked me to review a curriculum on the cardiovascular system for her website, and although I wasn't sold on the downloadable lesson plans and resources, the girls were enthusiastic about the topic. I searched around on the net and ransacked my own creativity and came up with some resources, experiments and activities to bring it alive.
 
I started out by asking them what they already knew and it was really interesting listening to their answers. Eve's answer was long, contained lots of part pieces of information, and showed that she had a good overall grasp of what the cardiovascular system does. Faith's answer was shorter, and contained less detail but was much more accurate. Their answers were really representative of how they learn best - Eve likes to have 'the big picture' then fill in the details whereas Faith prefers to know small parts and add them together to make a big picture. I asked them then what they wanted to know about the CV system, they said they wanted to know why the blood coming back to the heart has no oxygen, how the heart moves and how blood gets back up the veins without falling down again. This concept came from the curriculum I was reviewing and I liked the idea of starting this way, and I think I will use it again.
Making a model of a drop of blood based on this idea
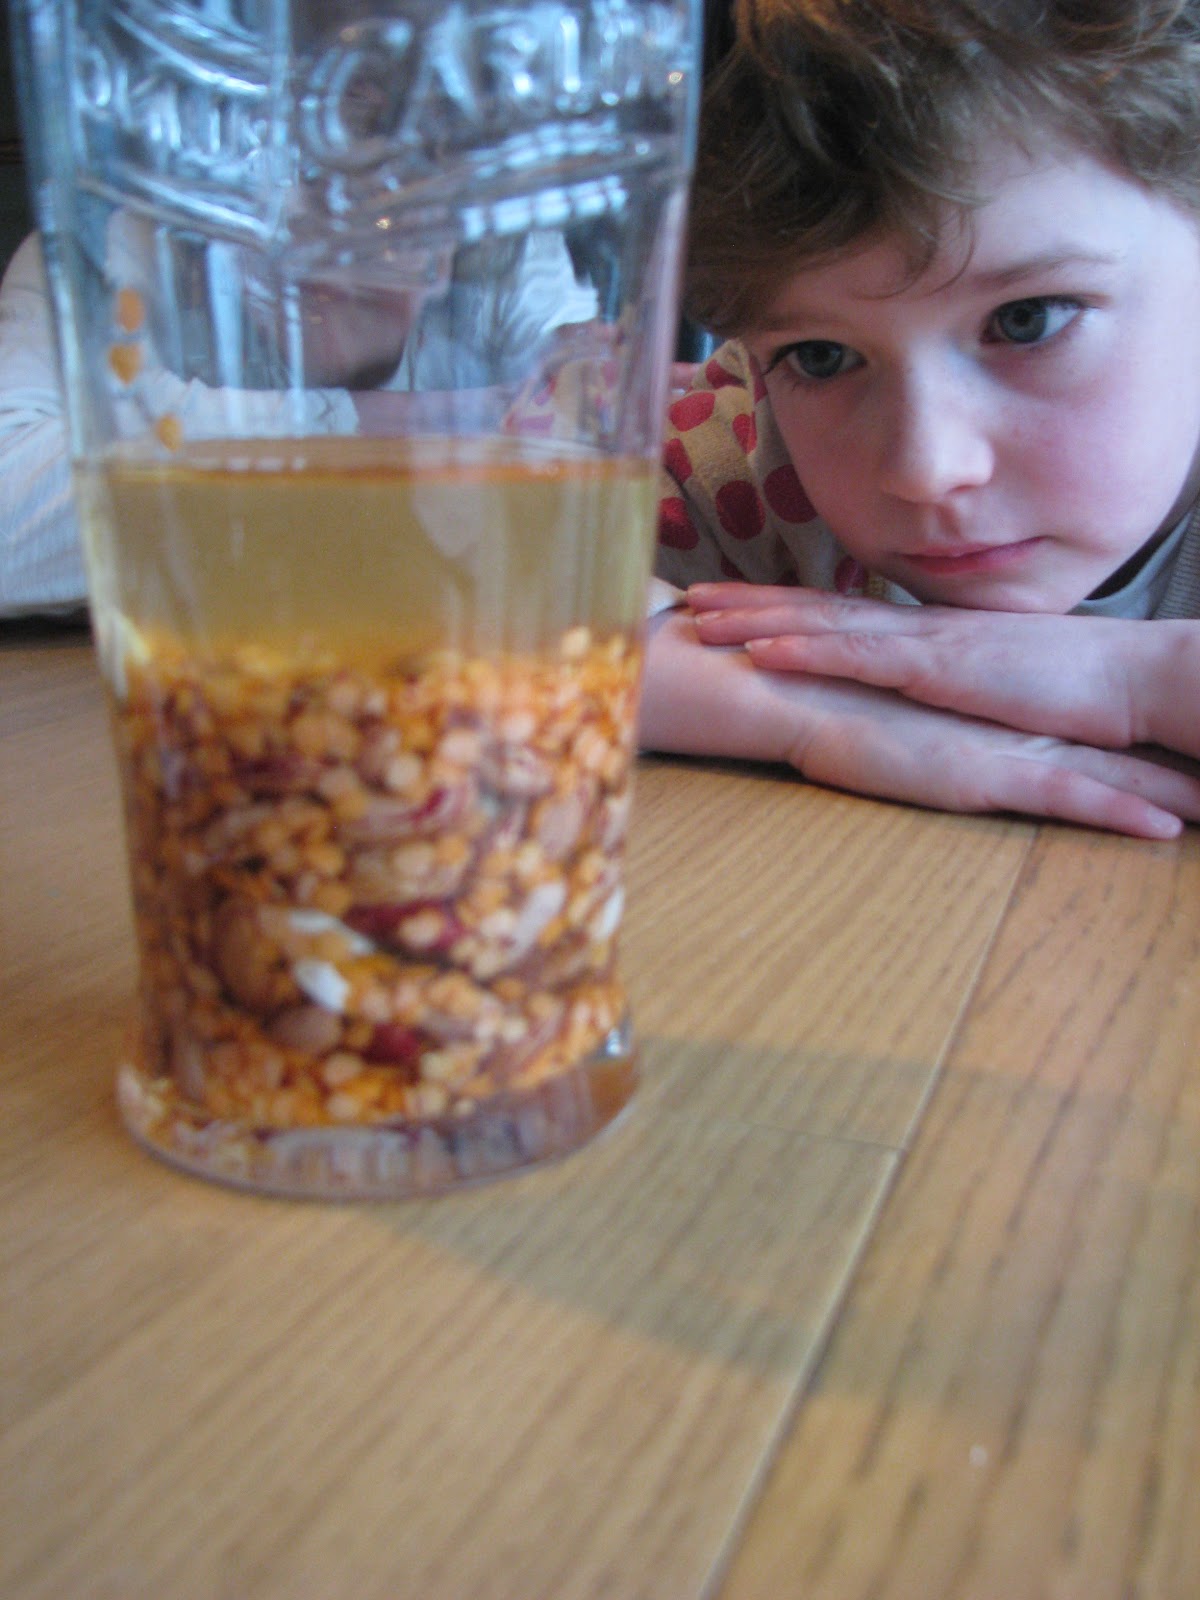
We started out talking about the blood, and it's main components of plasma (yellowish oil), red blood cells (kidney beans), platelets (red lentils) and white blood cells (butter beans). As the girls took turns to put them in, we discussed what each of the components did and so built up knowledge of the main functions of the blood (transport of oxygen and nutrients, clotting to slow and stop blood loss, fighting infection). Talking about all these things naturally led to us discussing the structure of the heart in some detail, how blood flows through it and what happens in the lungs.
The girls took turns to draw around each other to make a body diagram......
Diagram of the heart from here
I later discovered this site which has a complete set of full sized organs to print and assemble on your body outline!

....... and they then added a diagram of the heart and we looked closely to follow the route of the blood through the structures, with the girls getting used to the terminology. That led us on to discussing the differences between arteries and veins, their different roles and why arteries are buried deeper inside the limbs than veins.
We looked closely at our wrists and hands to see what veins we could see, I showed the girls how the artery in my wrist pulses, and we talked about what would happen if you cut an artery by accident or cut a vein. They used a lot of logic and applied things we'd talked about before to build their ideas and answers, it was great!
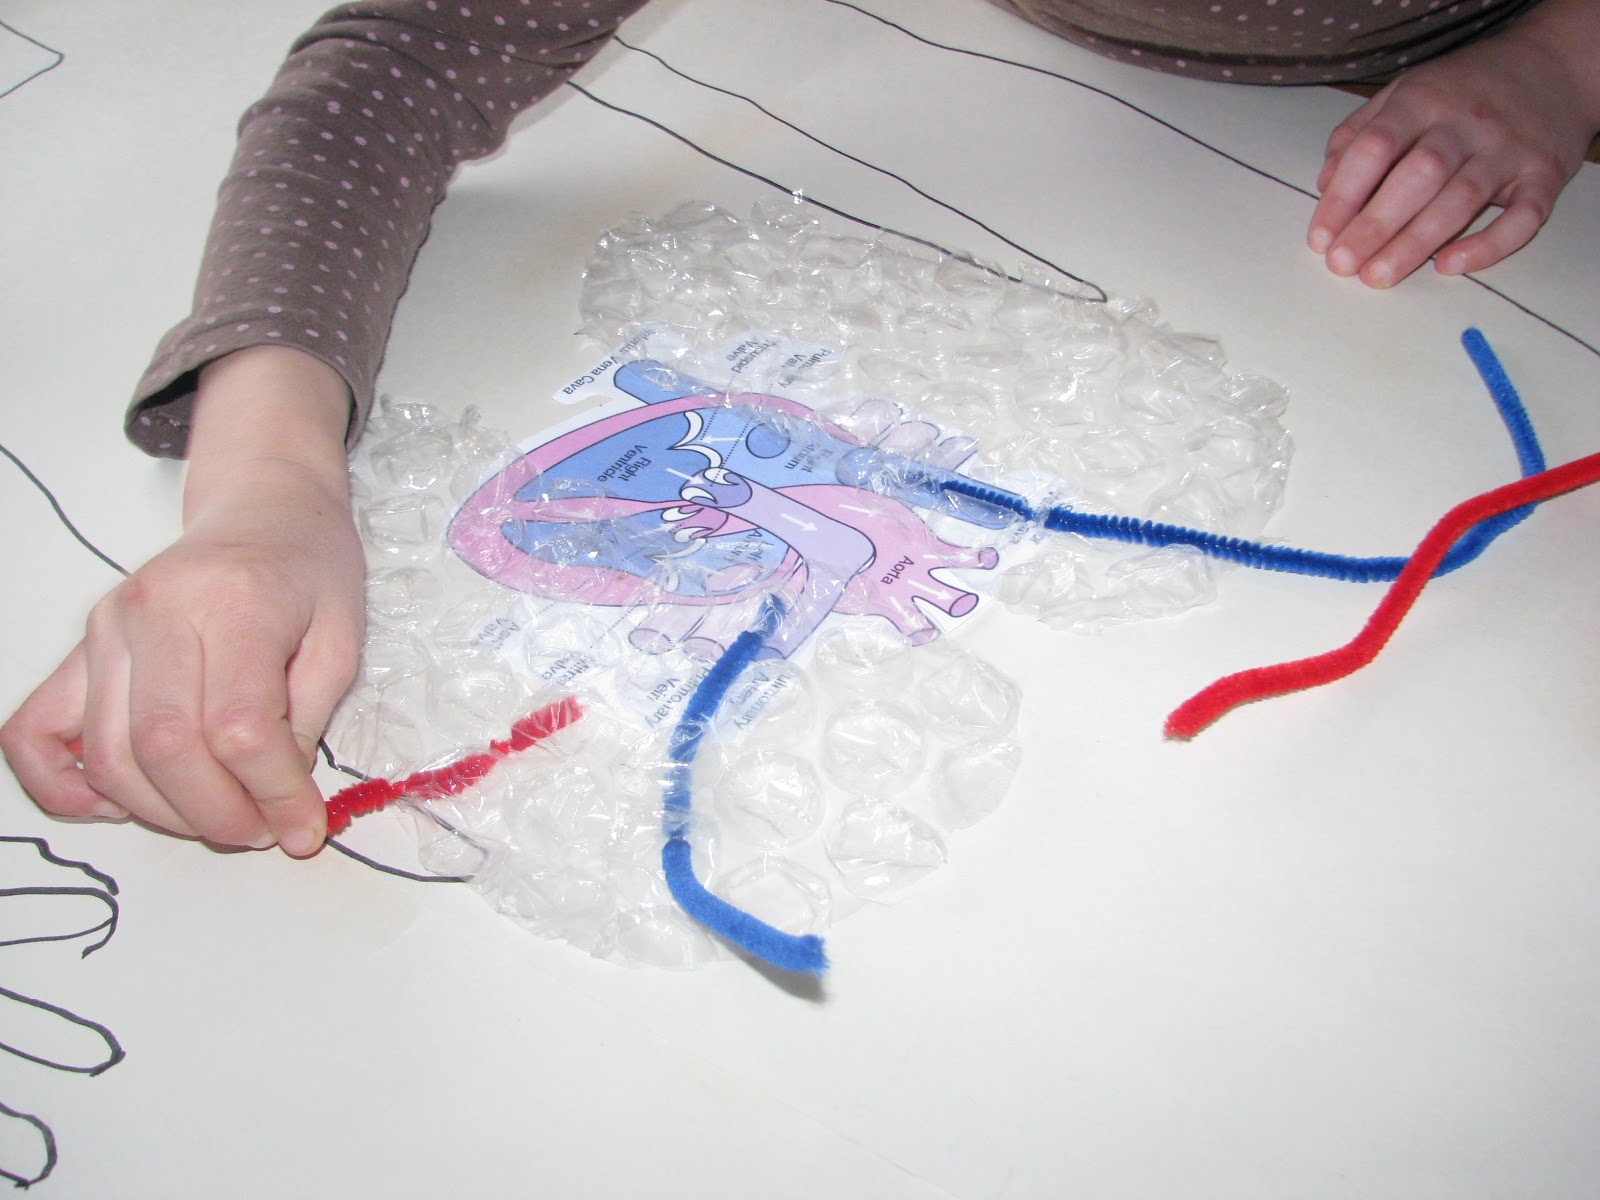
We added lungs made from over sized bubble wrap, and the main arteries and veins of the heart using blue and red pipe cleaners to demonstrate where they went.
Idris worked hard on copying the girl's 'listening poses' , see how intently he is looking at Faith?..... he was very funny bless him!
Another day we added the digestive system and liver onto the body diagrams and talked about how the blood collected nutrients from the small intestines and why and how the blood needed to be cleaned. The girls worked most of it out for themselves with a few leading questions to get them to think in the right directions.
 
A very simple demonstration with water in a straw showed the difference between having and not having a valve. We sucked up water into the straw, lifted it out and watched the water drain out immediately. Next we sucked water up, pinched the straw as hard as we could before lifting it out and saw that the water stayed put, so showing what valves do in a very basic way.  
As a finale to the fortnight of exploring the cardiovascular system, we looked at a heart. I had ordered a pig's heart from the butcher but none came so we had an Ox heart instead! It was HUGE, but was better in the end as being so large enabled us to see the structures inside really clearly. In the photo above, we were looking at the difference in muscle size between the left and right ventricles and applying what we knew about why they were different.
Here we looked from above down into the atria (which had been cut through before we got the heart) and saw the top of the heart valves.......
 .........then had a look from below at how the valve was tethered to the muscle.......
...... and |I was able to show them how the back force of the blood would snap the valve shut and stop the blood from flowing back into the atria, rather than going round the body. We could just about see the start of the aortic arch leading from the ventricle, but sadly the rest of the veins and arteries were missing. We did have a look at the criss cross of vessels on the outside of the heart and talk about why the heart itself needed a good blood supply.
 
It was a really enjoyable fortnight of science sessions about the cardiovascular system and the girls are keen to do more, they want to find out about bones next and add them to their body outlines!